AWS Load Balancer
Hi guys!!
Today's blog is about AWS Load Balancer. I am going to cover:
1) What is a load balancer ?
2) Types of AWS Elastic Load Balancer (ELB)
3) AWS Load Balancer setup.
So let's begin.
What is a Load Balancer?
Load balancers are servers that forward the internet traffic to multiple servers (EC2 instances). This helps in spreading the load and no single instance has to deal with all the traffic. A load balancer performs regular health checks of your instance and if any instance fails then no traffic is transferred to it. Using Load balancer is a good idea as your application only knows a single point of access and you are not exposing your backend servers. You can set two kinds of load balancer that are: internal and external. The internal means a load balancer which is private and can not be accessed from the browser/website and external means it can be accessed directly from the browser/website.
What are the types of ELB that AWS provides?
AWS provides 3 types of ELB, namely:
1) Classic Load Balancer: It supports HTTP, HTTPS and TCP traffic.
2) Application Load Balancer: It supports HTTP, HTTPS and WebSocket.
3) Network Load Balancer: It supports TCP, TLS and UDP.
AWS Load Balancer setup
Firstly, you need to setup EC2 instances with which you want to connect your load balancer.
If you don't know how to create EC2 instances, no worries, you can check my blog on Quick steps to launch your first AWS EC2 instance and SSH into it to create a webpage.
Now, I have already launched and setup two instances with index.html telling us which is server 1 and which is server 2.
Go to EC2 Dashboard and select Load Balancers from the side panel and click on 'Create Load Balancer'.
Select the Load balancer you want to setup:
1) Classic Load balancer
Setup the configuration for your Load Balancer. By default HTTP protocol is setup through which our load balancer will talk to our EC2 instances.
Create a new security group. For basic setup we will be keeping the default rule i.e. allowing anyone to access our load balancer from anywhere. You may want to change the protocol for more security, but for our tutorial, we will let it be this way.
Move forward from the Configure Security Setting and go to Configure Health Check.
For Health check, we will be using HTTP protocol on port 80 and the ping path can be either index.html or a '/', depending on what's the file name you have used for your webpage.
In Advanced Details section, you will have to configure the:
1) Response Timeout: Time to wait when receiving a response from the health check (2 sec - 60 sec).
2) Interval: Amount of time between health checks (5 sec - 300 sec).
3) Unhealthy Threshold: Number of consecutive health check failures before declaring an EC2 instance unhealthy.
4) Healthy Threshold: Number of consecutive health check successes before declaring an EC2 instance healthy.
In the next step select EC2 instances with which you want to connect your ELB.
After this Add Tags if you want, Review and create. When it's done you will see the newly created load balancer and all its details. In the Instance section of your CLB, you can check the instances connected with it and if their status is 'InService' it means they have passed the health check.
Now, go to Description and look for 'DNS name', if you pick this DNS name and hit the browser you will see your webpage and if you hit it multiple times, you will see that the file content is changing, which means that the load balancer is working and the traffic is being divided between both the instances.
So, our load balancer is working but there is still one thing that we need to do and that is to edit the rules of our EC2 instances, means I want my EC2 instances to only recognize traffic from my ELB. To do this we need to go to the security group of our instances and in the Inbound rules we need to make the change in the HTTP rule i.e. from '0.0.0.0/0' to your load balancer security group.
Save the changes and now if you hit your original server IP, it will keep on loading and won't show you the webpage. This means direct access to your EC2 instance is not allowed and it can only be accessed through ELB you just created.
2) Application Load Balancer
This is a new generation balancer, it allows much more benefits than CLB.
- It provides load balancing to multiple applications on the same machine. It uses target groups to provide load balancing to multiple applications across the machine.
- It supports redirects from HTTP to HTTPS
- It provides routing to different target groups based on URL path, hostname and query string.
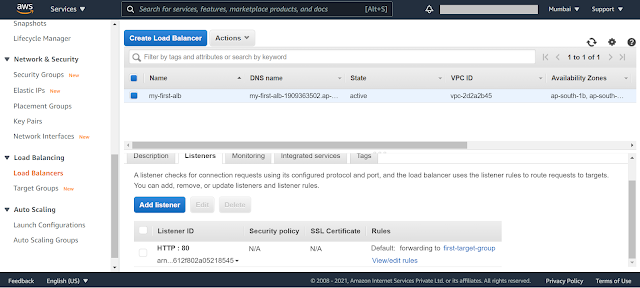
And your ALB is all setup.
Now, go to Description and look for 'DNS name', hit the browser with it and you'll see your webpage.
In ALB you can have multiple target groups, which can have multiple EC2 instances in it. You can forward the request to any target group based on the route, which you can set by going to Listener and updating it.


